Bonsai Forest Plantings: Design Inspiration & How They’re Made
Creating a bonsai forest — known in Japanese as “yose-ue” — is one of the most evocative and story-driven forms of bonsai design. Unlike single-tree styles that emphasize the beauty of an individual trunk, forest compositions capture an entire landscape in miniature. Done well, they evoke the feeling of walking through a quiet woodland, where spacing, species, and perspective all work together to create harmony.
A bonsai forest is not just a collection of trees in a tray. It’s a study of rhythm, proportion, and natural realism. Whether you’re drawn to delicate birch groves or dramatic pine clusters, understanding the underlying design logic will help your forest planting feel cohesive and alive.
What Makes a Forest Planting Work
The success of a forest planting bonsai depends less on each tree’s perfection and more on how they relate to one another. The viewer’s eye should flow naturally through the scene, guided by variation and balance.
Balance and asymmetry
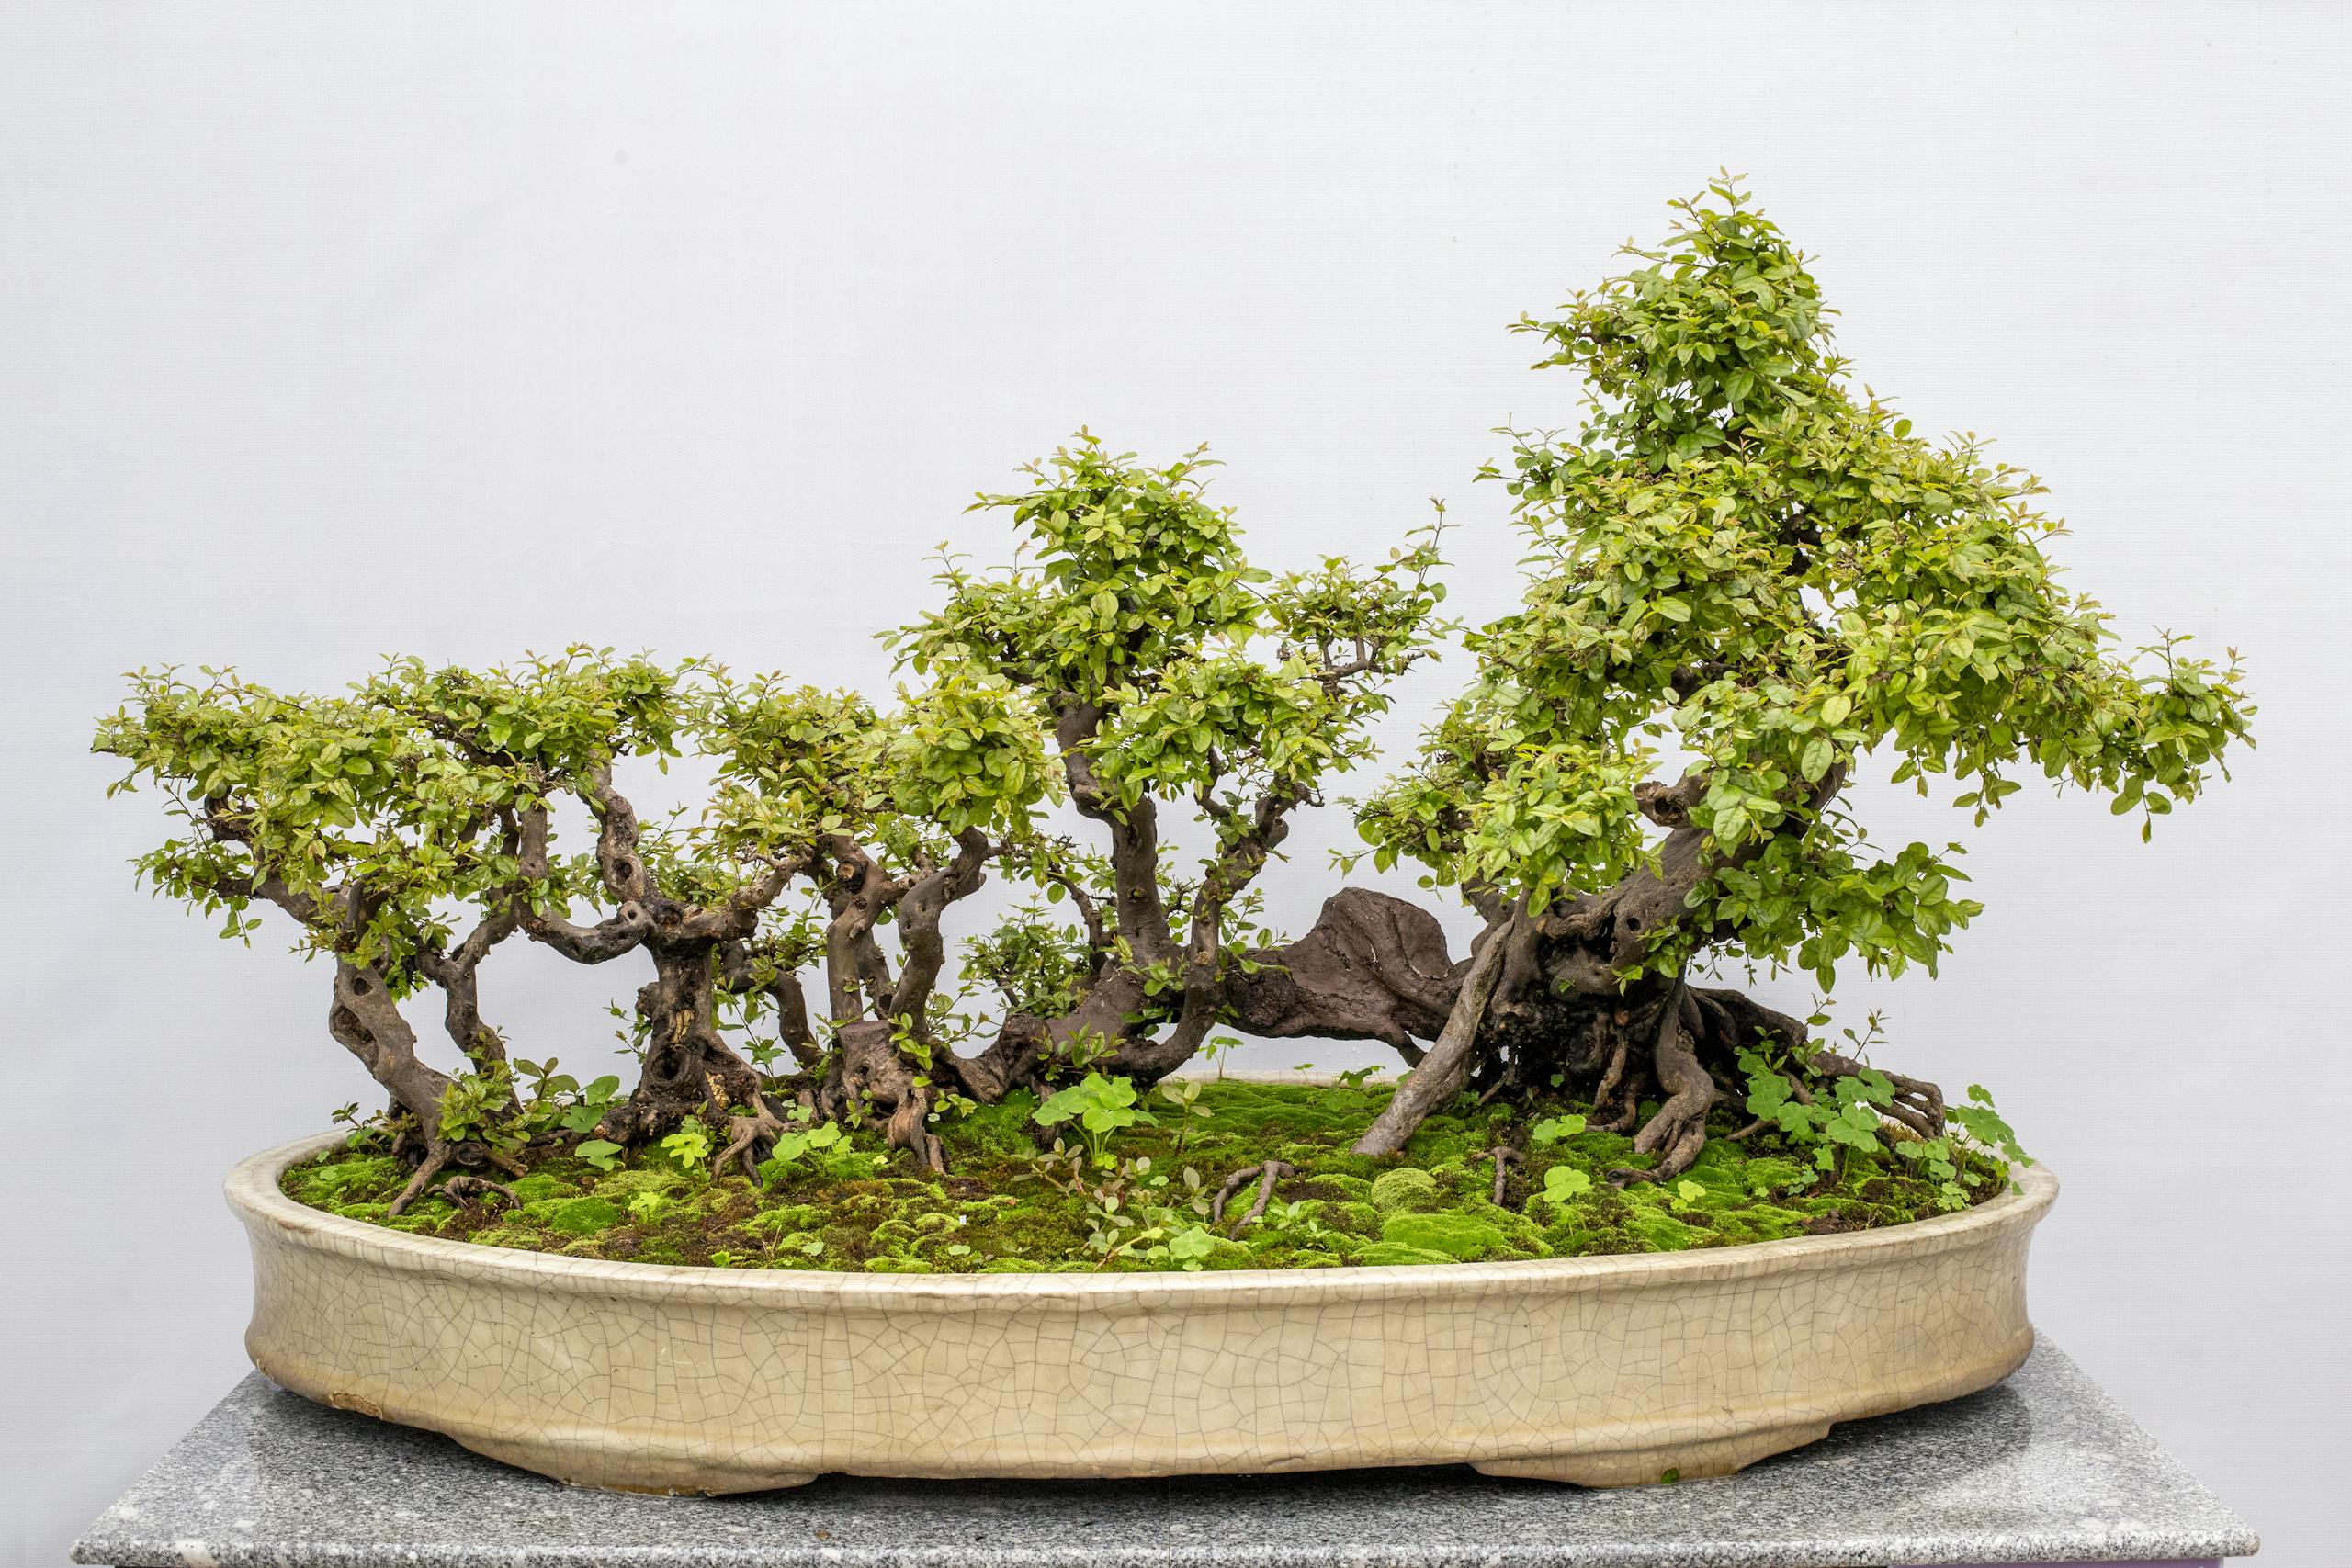
Nature rarely grows in straight lines. Instead of planting trees symmetrically, offset them slightly so that no line of trunks feels rigid or mechanical. The tallest tree — the notional “leader” — becomes the focal point, but its placement should feel organic rather than centered.
Imagine the tallest trunk as the “anchor.” From there, smaller trees radiate outward, creating a sense of progression and age hierarchy. Varying trunk thickness and height reinforces realism: older trees in the center, younger ones at the edges.
Depth and perspective
To create depth, position larger trees toward the front and smaller ones toward the rear of the tray. This simple trick mimics atmospheric perspective — the way distant trees appear smaller and lighter. A slightly diagonal arrangement helps guide the eye deeper into the scene.
A well-composed forest can create the illusion of space far greater than its actual size. You might see this principle beautifully executed in exhibits at the Best Bonsai Gardens & Museums in Japan (Tokyo & Kyoto), where yose-ue displays often mimic entire mountain valleys.
Cohesion through repetition
Although variety adds visual interest, too much difference in bark color, leaf size, or branching habit can feel chaotic. Repetition of form and texture creates unity. Even when using multiple species, choose ones that share similar leaf shapes or seasonal rhythms.

Choosing Species and Sizes
Species choice is crucial for how to make a bonsai forest that thrives long-term. Forest compositions require trees that tolerate crowding, shallow soil, and cooperative root growth. Deciduous species tend to perform best, though conifers can also succeed when carefully matched.
Ideal species for bonsai forests
- Japanese maple (Acer palmatum) – Beloved for its seasonal color transitions and graceful form. Different cultivars can add subtle variety without clashing.
- Trident maple (Acer buergerianum) – Compact leaves, vigorous roots, and excellent healing make it a classic for group planting bonsai.
- Chinese elm (Ulmus parvifolia) – Hardy, adaptable, and visually cohesive even with many trunks.
- Beech (Fagus crenata or Fagus sylvatica) – Elegant bark and fine ramification; perfect for mature forest aesthetics.
- Pine species (Pinus thunbergii, Pinus sylvestris) – For a rugged mountain feel; pair with moss and stones for realism.
If you prefer evergreens indoors, small ficus species can work, but ensure consistent humidity and bright light. Indoor forests need extra attention to watering and ventilation — for more guidance, see How to Care for a Bonsai Tree Indoors (Beginner’s Guide).
Tree size relationships
Varying trunk diameters and heights gives a sense of maturity. A good rule of thumb is a 1:1.5 height ratio between each successive tree. If your main tree is 25 cm tall, the next might be 17 cm, then 12 cm, and so on. Avoid uniform spacing — cluster trees in small groups to mimic how nature plants its seedlings.
Mixing species (optional)
Multi-species forests can be breathtaking but difficult to balance. Combine only species with compatible root vigor and water requirements. For example, pairing maples with elms often works, while mixing pines with water-loving deciduous trees can lead to imbalance. The most natural effect comes when you blend subtle variations within one botanical “mood” — for example, a grove of similar maples in slightly different cultivars.
Arranging, Spacing, and Angle
Once you’ve selected your trees, arrangement becomes the most expressive step. The artistry of a bonsai forest lies in subtle spacing and angling.
Planning your layout
Before planting, sketch your layout on paper or dry-arrange trees in the tray. Identify the main viewpoint — forests are usually viewed from the front, not top-down. The tallest tree anchors the composition off-center. From there, create clusters of two or three trees that flow outward like ripples.
The composition should form a scalene triangle when viewed from the front — this asymmetry prevents stiffness and suggests natural randomness.
Spacing for realism
In nature, trees rarely grow equidistantly. Place some close together, sharing a small mound of soil, while others stand slightly apart. This contrast helps the viewer imagine wind gaps, undergrowth, and terrain variation.
Root systems should interlock slightly but not overlap excessively. Leave enough room for air circulation and future growth. The soil surface should slope gently upward toward the central trees, creating the illusion of terrain.
Angling for perspective
Tilting trees slightly outward from the center adds dynamic flow. Avoid perfectly vertical trunks except for the leader — outward angles imply exposure to wind and light competition. Varying tilt direction gives each tree individuality without losing cohesion.

Trays, Soil, and Aftercare
A successful forest planting bonsai relies as much on its foundation as its design. The tray, soil mix, and ongoing care determine whether your miniature woodland flourishes or fades.
Choosing the right tray
Forest plantings traditionally use shallow, wide trays to emphasize horizontality and open space. Unglazed neutral tones — gray, brown, or sand — keep attention on the trees. For deciduous forests, earthy ceramics with subtle texture work beautifully. For coniferous forests, darker tones accentuate the greenery.
When selecting, consider:
- Proportion: Tray width should be roughly 2–3× the tallest tree’s height.
- Depth: Shallow enough to suggest a natural plain but deep enough to anchor roots.
- Shape: Rectangular for order and calm; oval or irregular for naturalistic appeal.
If you’re unsure how to evaluate pots more generally, read Indoor vs Outdoor Bonsai: Which Is Right for You? for broader container insights.
Soil and drainage
Because multiple trees share limited space, drainage is critical. Use a mix that balances moisture retention and aeration — typically akadama, pumice, and lava rock in a 2:1:1 ratio. In wetter climates, add extra pumice; in dry climates, increase akadama slightly.
Moss or ground cover helps prevent surface drying and completes the forest aesthetic. Apply moss selectively, leaving patches of exposed soil to simulate natural variation.
Watering and feeding
Forests dry faster than single-tree bonsai due to the number of root systems competing for water. Check soil moisture daily. Water thoroughly until water flows from the drainage holes, ensuring even saturation. Feeding should be light but consistent — small doses every two weeks during the growing season maintain vitality without forcing excessive growth.
Seasonal maintenance
- Spring: Repot if roots have filled the tray; prune long shoots early.
- Summer: Monitor moisture and shade during heat waves.
- Autumn: Defoliate or thin to reveal structure and enhance ramification.
- Winter: Protect roots from freezing, especially in shallow trays.
Well-kept forests evolve beautifully over time, each season revealing a new texture or color shift. For ideas on seasonal care, exhibitions, and workshops, see World Bonsai Destinations: US & Europe Exhibits & Clubs.
Inspiration Gallery Notes
Seeing finished yose-ue works can inspire your own creative approach. Each arrangement tells a different story — a riverbank grove, a mountain slope, or a dense thicket catching the morning light. Below are some stylistic directions to consider.
Mountain ridge compositions
These use conifers like pines or junipers arranged on mounded soil and rock. The overall silhouette rises toward one corner, implying altitude and wind exposure. Moss and small stones imitate alpine texture. This style often uses rectangular or irregular trays.
Riverbank and valley forests
Deciduous species with fine branching, such as maples or beeches, form gentle curving lines that resemble trees following a river course. Slightly oval or glazed trays in muted greens and blues evoke water presence. These are often seen in Japanese spring exhibitions where bright new foliage adds liveliness.
Mixed grove concepts
Some artists combine multiple leaf colors or textures to mimic natural succession — for instance, lighter maples mixed with darker hornbeams. This style requires precise pruning to keep balance but can create breathtaking seasonal contrast.

Learning from established masters
Studying display forests at Japanese gardens such as Omiya Bonsai Village or Kyoto’s Taikan-ten exhibition offers deep insight into spacing and aging techniques. Pay attention to how trunk bases merge visually, how soil mounds imply subtle terrain, and how foreground trees are pruned for visibility.
When possible, visit bonsai gardens in person. Observing forests outdoors gives you a more intuitive sense of spacing and natural randomness — something no guide can fully convey. Many Western collections now include outstanding yose-ue examples, such as those at the U.S. National Bonsai & Penjing Museum and Europe’s major exhibitions.
Bringing It All Together
Creating your own bonsai forest blends horticultural discipline with landscape artistry. Success lies in balance — between individuality and unity, control and wildness, design and growth. A well-composed yose-ue draws the viewer in not just through beauty but through believable realism.
Start small with just five or seven saplings in a shallow tray. Observe how they interact, how light filters through the canopy, how roots begin to knit together. Over time, refine spacing, prune gently, and adjust orientation as the trunks mature. What begins as a group of seedlings will, with patience, evolve into a living landscape that embodies calm and age in miniature.
For enthusiasts ready to take their practice further, explore forest styles in person, study professional exhibitions, and keep refining your sense of proportion. A bonsai forest is never finished — it’s an ecosystem that matures alongside you, growing richer with each season.


