Beginner Photo Guide: How to Photograph Your Bonsai at Home
Photographing your bonsai tree is one of the most satisfying ways to document its progress and share your work online. Even if you’re using only a smartphone, you can create professional-looking photos at home with a few simple techniques. This guide covers the essentials — from lighting and backdrops to angles and editing — so your bonsai’s character and shape come through clearly in every shot.
Lighting and Backdrops for Small Spaces
Lighting is the single most important factor in bonsai photography. It determines whether the tree’s structure looks flat or alive. The goal is to bring out texture and form while keeping shadows soft.
Natural light is your best starting point. Place your bonsai near a window with indirect daylight — ideally one facing north or east. This creates gentle light that enhances leaf detail without harsh glare. If you only have strong direct sun, diffuse it with a thin white curtain or sheet to soften the highlights.
Artificial lighting works too, especially when you’re shooting at night or in low-light rooms. Use two lamps: one main light about 45 degrees from the front of the tree, and another smaller one on the opposite side to fill shadows. LED desk lamps or small photography lights with daylight bulbs work perfectly for home setups.
Choosing the Right Backdrop
A clean, uncluttered background helps focus attention on your bonsai’s form. Neutral tones like white, gray, or black make most trees stand out. For lighter trees, choose a darker backdrop, and vice versa. Avoid busy patterns or colorful walls that distract the eye.
A large sheet of paper, a roll of craft paper, or a fabric panel can serve as an easy DIY backdrop. Curve it gently where it meets the table to create a smooth transition instead of a harsh corner.

If you’re photographing your bonsai outdoors, look for even shade. Early morning or late afternoon light creates soft shadows and pleasing color balance. Avoid mid-day sun, which can wash out fine branch details.
For inspiration, you can look at professional display standards in World Bonsai Destinations: US & Europe Exhibits & Clubs or visit Japanese institutions that have mastered bonsai presentation, such as those mentioned in Best Bonsai Gardens & Museums in Japan (Tokyo & Kyoto).
Camera or Phone Settings that Matter
Modern smartphones can take excellent bonsai photos when used thoughtfully. The key is to understand how light, focus, and exposure interact.
Focus and Exposure Lock
Always tap your bonsai on the screen to set focus before shooting. This ensures sharpness on the trunk and main branches, not the background. On most phones, holding your finger after tapping locks both focus and exposure — helpful when light levels shift.
If you’re using a camera, choose aperture priority mode (often labeled “A” or “Av”). Set your aperture between f/4 and f/8 for balanced depth of field. Lower numbers blur the background more, which can make your bonsai stand out against simple backdrops.
Adjusting Brightness
Bonsai leaves can be tricky under bright light — especially glossy species like ficus or azalea. Lower the exposure slightly to prevent blown-out highlights. Many phones allow manual control via a small sun icon that appears when focusing.
Stability and Tripod Use
Blurry photos usually come from camera shake. Even a small tabletop tripod can dramatically improve clarity. You can also rest your elbows on a table or hold your breath briefly while shooting. Consistency matters most if you want to document your tree’s progress over months or years.
For indoor setups, consider using a timer or Bluetooth shutter to avoid shaking the phone when pressing the button.

Angles that Reveal Structure
Every bonsai has a front — the viewing angle that best shows off its shape, trunk movement, and branch arrangement. The same principles that apply to display apply to photography.
Find the Tree’s Character Line
Start by observing your bonsai from eye level. Tilt and rotate it slightly until you find the angle where the trunk’s flow feels natural and the main branches layer nicely without crossing. This is your primary shooting angle.
Take additional shots from slightly above or below to emphasize different aspects. A low angle can make the tree appear taller and more dramatic, while a high angle highlights canopy spread.
Frame for Proportion
Keep the pot fully visible but avoid too much empty space above the tree. Align the bonsai slightly off-center to create visual tension and balance. If your background is plain, this asymmetry feels intentional and elegant.
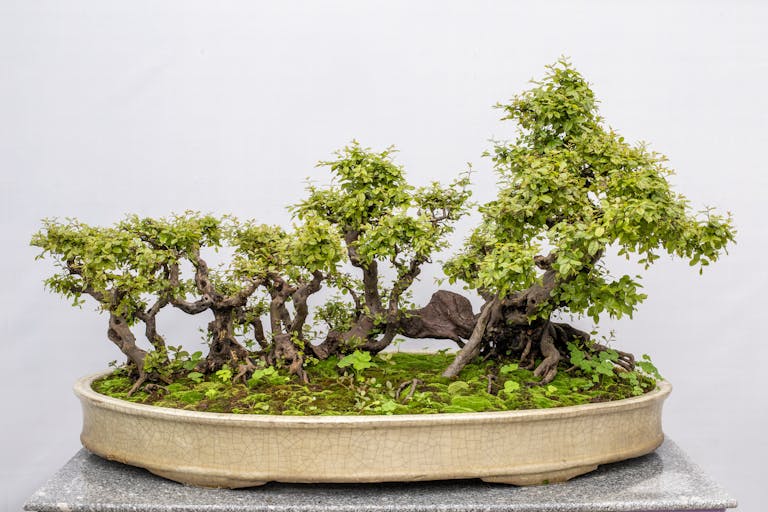
When photographing forest-style or group plantings, move the camera back a little and shoot level with the horizon line. This preserves the miniature landscape illusion.
Show Seasonal Changes
Documenting changes through the seasons — budding in spring, full foliage in summer, color in autumn, bare structure in winter — builds a richer story. Indoor species that grow year-round, such as tropical bonsai, can also be photographed during pruning or wiring sessions to show progress.
For indoor species or trees that live inside permanently, see How to Care for a Bonsai Tree Indoors (Beginner’s Guide) for maintenance tips that keep them photo-ready.
Simple Editing and Sharing
Even basic editing can make a huge difference in how your bonsai photos look online. You don’t need expensive software — just a few adjustments using your phone’s default editor or free apps like Snapseed or Lightroom Mobile.
Crop and Straighten
Trim away empty space and ensure the pot sits level with the bottom of the frame. A crooked horizon line can subconsciously make the tree feel unstable. Maintain enough breathing room around the branches so the photo doesn’t feel cramped.
Adjust Lighting and Color
Slightly boost contrast to bring out bark texture and leaf definition. Adjust warmth (color temperature) so that greens look natural — not too yellow or blue. If your background looks uneven, use the “selective” or “brush” tool to brighten or darken specific areas.
Avoid heavy filters or oversaturation, which can make your bonsai look artificial. The goal is to recreate how it looks in natural light.
Manage Reflections
Glossy leaves, glazed pots, and moisture on the soil can reflect light in distracting ways. If reflections remain after shooting, use the “healing” or “clone” tool to remove small bright spots. You can also reduce highlights slightly to balance overall tone.
Sharing and Organization
If you’re sharing your bonsai journey on social media or forums, consider creating albums by species or year. Captions noting pruning dates or repotting sessions make your feed informative as well as beautiful.
When showcasing your tree online, it can also help to mention whether it’s an indoor or outdoor species — readers often ask about climate compatibility. Linking to guides like Indoor vs Outdoor Bonsai: Which Is Right for You? provides helpful context and keeps users exploring your site.

Building a Habit of Observation
Photography isn’t just about sharing — it’s a training tool. By photographing your bonsai regularly, you’ll start to notice subtle growth patterns, leaf density, and balance changes over time. These visual records are invaluable when planning future pruning or repotting sessions.
Try to photograph your bonsai every few weeks from the same distance and angle. Label each image with the date and any key notes. Over time, you’ll build a timeline of your tree’s evolution that’s as rewarding as the cultivation process itself.
Whether you’re shooting with a phone by a sunny window or experimenting with a home lighting setup, bonsai photography deepens your connection with the art form. Each photo is a small moment of reflection — a chance to appreciate how much your tiny tree has grown under your care.
With the right light, a thoughtful backdrop, and attention to detail, your bonsai photos will not only look professional but also tell the quiet story of patience and progress that defines the art itself.